Adding an Augmented Reality Video to Connected Learning Principles

(NOTE: THIS IS UPDATED WITH LINK TO THE OVERLAY. I HAD TO FIGURE IT OUT!)

I’m following the lead of some new friends on the Making Learning Connected MOOC by trying out Augmented Reality. I toyed with the concept a few weeks ago but then lost the thread. I’m back, now, thanks to some exploration being done by others, and we are using the app called Aurasma. What it does is allows you to layer (they call it an “aura”) media on top of an image. The app comes with some animated “auras” but I wanted to see how I could put a video on top of an image.

So, given our focus on the principles of Connected Learning in the MOOC, I decided to use this image as my launch point:


http://connectedlearning.tv/sites/connectedlearning.tv/files/connected-learning-print.jpg

(or go directly to the image for full screen)

If you want to see the video that I created, explaining what Connected Learning means to me, you will need to use a mobile device, download the Aurasma app, and point it at this poster right here in this blog post. I’ve been testing it out by pointing my iPad at my Laptop, which is sort of weird in a way I can’t quite explain. (By the way, it doesn’t matter where you view this poster because as long as the app recognizes the image, it will launch my augmented reality layer). Once this fantastic concept map of Connected Learning is in the view finder of the app, the video should (?) launch. Actually, this is one of my questions: If anyone with the app points at this image, will it always bring up my aura layer?

Or if you are on your mobile device right now, use this direct link: http://auras.ma/s/0a79E to get started.

I took a quick screenshot of what it should look like when the video launches:
Augmented layer connected learning

I’d really like to know if this experiment with the Connected Learning principle map worked for you, and what possibilities you might have for augmented reality. What can we make with this kind of app? How can we connect?

Peace (in the layer),
Kevin

PS — here is a video that was shared in the MOOC about using the App. It gives a good view of what it all looks like.


Toy Hack: Lighting up the Lego Head Tree

Toy Lego Head Collage

As we explore the hacking and remixing of toys at the Making Learning Connected MOOC, I’ve been eyeing my sons’ toys around the house (they’ve been looking at me strange as I’ve been doing it, as if I were in another of our “let’s get rid of toys in order to get rid of clutter” mood). Sometimes, I’ve literally looked under foot. We have Legos everywhere, and if ever there is a remixable toy (other than Mr. Potato Head), it is a set of Legos.

I didn’t want to just build something. That’s not necessarily hacking a toy, although I did experiment a bit with a multi-headed motorcycle-riding Lego man flying through the air (as I played around with some trick photography). No, in the spirit of the MOOC, I wanted to dive in a little different.

The other day, I noticed something tucked away in the closet. If you are a teacher, you may get gifts now and then from students, Gifts you appreciate more for the thoughtfulness than for the usefulness. That’s what I saw. It is a little Christmas tree that lights up when you plug it into your computer via USB. I had never even tried it before, but now I saw my chance. What if I could mix the Legos with the Tree? What would that look like?

Here is a shot of the scene before I turned on the tree. I put down a black t-shirt as the backdrop, which worked out nicely.
Lego Heads Raw

Here is one of the scenes after I plugged in the tree:

Blue lego heads
Turns out, it looks pretty cool and eerie. I decided to create a sort of Lego Prayer Scene around the tree, with Lego heads as ornaments and the headless bodies in rapt attention to the tree. At the very top, I put a stern-looking dude, as if he is wielding some sort of magical power on the heads and bodies below him. The tree turned out to be interesting, too, because it scrolls through different colors.

I took pictures as each color flashed by, and then decided that I would use Photobooth to get a few more, tweaking the image in various ways. I loved this one:

photo 1

The final step was using an app I have (Great Photo) to create a collage of the collection of photos, pulling them all together into one large image file. The result is an interesting mix, and makes me wonder about the possibility of telling a story with the image. I have an idea, but I’ll report back with that tomorrow.

For now, enjoy the Lego Head Tree.

Peace (in the scene),
Kevin


Hacking Frogger (or rebulding a classic video game)

We’re doing some “toy hacking” this week with the Making Learning Connected MOOC, but we’re also talking about play and games, and I figured I would share this video game hack of the classic game, Frogger. This was done as part of a summer course last summer that I took part in (or shadowed) through Gamestar Mechanic. One of the tasks, like our MOOC, was to take a classic game and come up with something new with the tools in Gamestar.

I chose Frogger. Mine is called Rebuilding Frogger.

(or go directly to the game)

What’s interesting when you hack an existing game, as opposed to completely inventing your own, is that there are both limitations and freedom. In some ways, you want to retain the spirit and feel of the original. On the other hand, you are trying to make your own mark, and so you need to work in something different, too. Finding that balance between homage to the original and extension of creativity can be difficult, I have found.

In Gamestar, there were limitations, since the “toolbox” that you can draw from to build a game is limited. I kept the basic premise (move from bottom to top, avoiding obstacles) and then added a Gamestar feel to it. Frogger works well for this kind of activity in Gamestar, because the video site is built around top-down games (or platformer, so you could hack Mario, for example).

By the way, you can play an online version of the original Frogger, too.

Check out the original Frogger

Peace (in the game),
Kevin


When Pigs Fly: Toy Hacking

 
pigsfly toy make overview

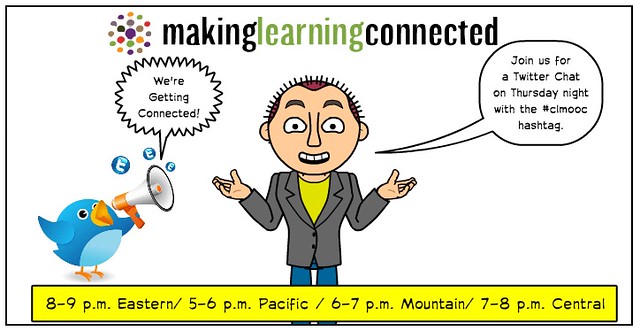
In our second Make Cycle at the Making Learning Connected MOOC, facilitators Stephanie and Karen suggest we all try to do a little “toy hacking.” What that looks like is up to us (and they are going to be doing a live Google Hangout tonight at 9 p.m. eastern time to talk about how you might go about hacking a toy) and how we capture it and share it is up to us, too.

I was school the other day, and saw a cute little stuffed pig that I often have in the room (squeeze it and it oinks), and thought: how can I make that pig fly? Now, I probably should have been asking myself, Why aren’t these reports cards done yet? Or, why not use my time to clean up the room? Or any other question related to the last week of school (yes, we are still in school).

Instead, I wanted to make the pig fly. I got down to some making.

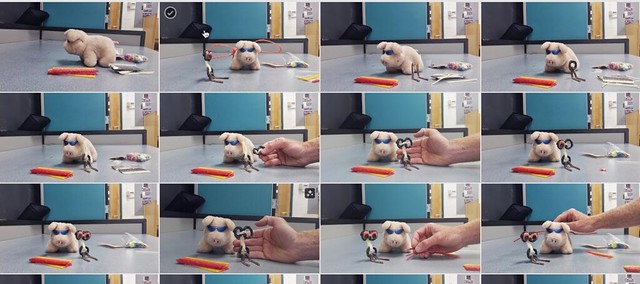
I gathered up materials along with the pig, including Wiki Stix, string, scissors, and a pair of sunglasses (the pig needs to look cool, right?). As you know if you follow my blog, I have done my share of stopmotion. I considered that as an option, but then wondered if I could do an animated .gif file instead. It’s the cousin to stopmotion, but the file becomes a photo file not a video, and it loops constantly. I’ve wondered about the possibilities of .gif files for some time, yet never made one myself (other than with Pivot Stickfigure, and even then, I would convert it into a movie file).

I set up a camera and as I worked to create a Wiki Stix companion for the pig, and to put wings on the pig, and to get the pig soaring with the help of string, I would reach over and take images every now and then. I ended up with about 20 pictures. Now what? Here’s where I ran into some troubles. I tried two different only websites that touted the ability to create animated .gif files, but I think my pictures were too large. Or the sites stink. Either way, the result was the same.

Fail.

I then remembered that the photo feature in Google Plus now can magically “animate” as series of photos that have the same background into an animated .gif replica. So, I went that route, uploading the pig pics (nice alliteration), but Google Plus would not animate the entire set, only a few of images. It looked pretty neat, but not what I wanted.

Fail.

I went into the App Store, and paid two bucks for a .gif maker called Gif Animator. The first time it rendered the project, the file was so huge it choked my ability to even preview it.

Fail.

Diving into the settings of the app, I changed the output to something more manageable, and did another round of rendering. Success. I had an animated .gif of my pig flying. Now, to host it somewhere in order to share it out with the MOOC and the world. My first thought was Flickr, which used to be able to host .gif files. Not anymore.

Fail.

I put the call out on Twitter for help in finding a hosting site. Nobody responded.

Fail.

So I opened up my search engine and saw that Photobucket has the ability to host animated .gif files. I uploaded the project and finally, there it was: my pig in flight.

Success!
Pigs Fly Toy Hack for #clmooc photo ToyHackPigsFly3_zps898b71f1.gif
I also later realized I could upload the .gif into Google Plus, and the animated file could be shared in my Google Plus circles, so now my pig flies in a few different places. But it does not allow you to embed outside of Google Plus, so that didn’t really help my cause.

The result is that I had a lot of failure along the way, and much of it had nothing to do with the hacking of the toy to make it fly. The failure had to do with the technology and navigating a system for creating and sharing out. That is frustrating, and yet, it is also exhilarating on a certain level to know you figured the workaround. Almost like beating the system. The key is not to give up. And be sure to raise your arms up and give a holler when your vision is reached.

Yahooo!

In some ways, I was as much hacking the technology as I was hacking the toy, and if that’s not what the Making Learning Connected MOOC is about, then I don’t know what is.

Peace (in the hack),
Kevin


Considering Twine as Video Haiku: Letter to the Future

Yesterday, a colleague in the National Writing Project’s Making Learning Connected MOOC made an observation about the Twine video app that brought something into focus for me. Elyse Eidman-Aadahl observed that while the six second limit on the video is short, one could almost imagine using twine as “haiku” and that reminded me of an interview that I read in Wired Magazine with the creators of Twine about how they envision folks having just enough time to film 2 second beginnings, 2 second middles, and 2 second endings to create a short narrative.

At first, I was thinking: yeah right.

Two seconds to set a story in motion and four seconds to complete it? It seems almost impossible to do so. But then Elyse’s comment about video haiku kept coming into my mind — what we did see the video in three parts. I wondered if it would be possible to tell a story in six seconds. How could you film something and leave much of it out? What would you expect the audience to infer?

A story began to form in my head … of writing to your future self. The story would begin with an envelope, addressed from the present self to the future self (in clear lettering, easy for viewer to read quickly); the next part would be crumpled up papers, showing frustration about what to write — and these would be mostly negative starts; and then ending would be a letter about love, being stuffed into the envelope to the future self. It would capture in six seconds the idea of what we want to pass on to ourselves in the years down the road. Hopefully, that would be love, and not worries, fears, and negative energy.

Thus, the short film:

What do you think? Although I shot the video in three short takes, I thought about the “story” for hours yesterday, visualizing how I would film it. Six seconds? Not a lot of time. But if you think of it like video haiku — three parts, looping over and over, hinting at something larger– Vine as a venue for storytelling starts to have possibilities.

See what you can make and share it out. Let’s inspire each other to push the technology in creative directions. Tell a story. You have just six seconds. Make each second count.

Peace (in the make),
Kevin


Using Vine: Coffee and the #CLMOOC in the Morning


I’ve had the Vine video app (6 seconds and that’s it) on my iPad for some time now, trying to figure out how to use it. I am a fan of the concept of “short” (see my Ignite presentation from NCTE) so this seems like it would be a natural fit for me to try out. But I remain a bit at a loss of how to shoot a meaningful six second video. I mean, six seconds … that’s not just short — that’s wicked short (as they say here in New England.)

But with other friends in the Making Learning Connected MOOC starting to share their own vines, and looking for others to become part of the experience, I dug out the app again this morning, and decided to capture how important coffee is to my morning reading and writing experience. I sequenced it out in my head with four short scenes, and … it’s not bad, I guess.

Still, I continue to wonder … how might we tell a story in six seconds. A plot. A character or two. Dialogue? Still thinking that one over …

Peace (in the shortie shorts),
Kevin


Making Black Gold (or Master of the Compost Bin)


I’ve been doing a lot of digital “makes” this week for the Making Learning Connected MOOC, and it seemed like it was time to get off the screen and get my hands dirty. While I am not a gardener (and don’t play one on the Internet), I am the vigilant Compost Man in our home. So, what I make is black gold — the rich soil that grows our veggies and flowers.

Peace (in the dirt),
Kevin


Mad-style Free-Style Twitter Chatting on the MOOC

Meme twitter chat

We hosted our first Twitter Chat last night, and boy, talk about a mad rush of ideas. I’ve taken part in chats before, but to be (with my friend, Terry) one of the facilitators as tweets come fast and furious was interesting and little breathtaking in its pace and speed. The hour flew by and before I knew it, we had begun and ended. In between those time warp moments, though, a slew of folks chimed in about where they were from, what they were doing in the Making Learning Connected MOOC, how they were making connections, and more.

Topics moved from the digital versus non-digital “makes,” and the use of infographics in the classrooms, and how to make connections with others outside of the MOOC. There was more sharing of technology tools, and instructions on how to begin to establish stronger connections within the community.

It was fascinating to see the conversations unfolding, blasting down the screen. Terry and I had a list of questions ready, which we popped into the mix every now and then, but for the most part, our job was welcoming folks and validating ideas, and asking questions to spur the conversations further along. You know the phrase, herding cats? That was what it was like, but in a good way, as if all the cats were purring and ready for play.

And in fact, the beauty of the MOOC community that we are helping to establish is that it can be self-sufficient, and supportive from within, with only minimal structural help from the facilitators. That’s a wonderful thing.

Peace (in the reflection),
Kevin


The #clmooc Twitter Chat is Tonight (Thurs)

Join the Twitter Chat

We invite you to come join us for the first Twitter Chat for the Making Learning Connected Massive Open Online Collaboration (MOOC) as we explore how the first week of the MOOC has been going, give some teasers of where the MOOC is headed, make visible some of the connections to the Connected Learning principles, and answer questions that YOU may have about the summer project (already with hundreds of teachers involved).

The Twitter Chat — facilitated this week by Terry Elliott (@tellio) and myself (@dogtrax) — will be taking place tonight (Thursday June 20) from 8-9 p.m. Eastern/ 5-6 p.m. Pacific / 6-7 p.m. Mountain/ 7-8 p.m. Central with the #clmooc hashtag.  If you have never taken part in a Twitter Chat, it’s OK. We have designed a resource guide to help you get started: http://blog.nwp.org/clmooc/guide/getting-started-with-twitter-and-twitter-chats/

A Twitter Chat is a freewheeling conversation that is anchored on Twitter with a hashtag (in this case, we are using #clmooc) that then later gets archived and shared back out to the community.

It’s OK to lurk and see what it’s all about. We do invite you to participate, too, if you are interested, and we encourage you to make connections with others in the Making Learning Connected community. This could be done any number of ways, but finding common hashtags in Twitter and Google Plus is one possibility. (We built a resource about Google Plus, too.)

I hope to “see” you there, as we extend our MOOC conversations in every little corner of the Internet.

Peace (in the chat),
Kevin