We did some podcasting in my classroom yesterday with a portable voice recorder. Their first writing project for the year was a Biopoem and I had them take a line or two from their poems and read them out loud, creating a classroom collective audio Biopoem as they were sharing their words with the class. They were very excited about podcasting and I will play the files for them today in class (and remind them they can go to our classroom site – The Electronic Pencil – to hear all of them, and I will direct parents there, too).
I wanted to share the Dream Scenes that my students have been creating in the first days of school this year, using PhotoStory and MS Paint to capture their voice and vision for themselves. (They have loved this project, much more than when we did the paper version — they have been so fully engaged in what they are doing).
I used the new Edublogs TV as host of the video, since it now integrates pretty nicely with regular Edublogs and has not advertising or outside questionable links.
Here is the video:
This text will be replaced
Oh, you can see my dream at the very end of the video.
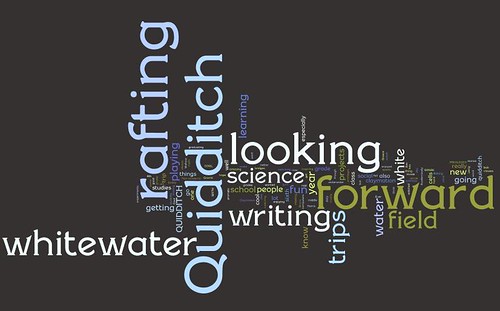
I experimented with a Google Docs Survey Form this week with my students. It allowed me to gather some interesting information, although I am still struggling with how to look at it in a meaningful way. One thing I did was take all of the student responses from a question on things they are looking forward to this year in sixth grade and popped them into Wordle.
Here is what came out:
We play a game of Quidditch at our school, which is very popular, and I like that writing is pretty big, too.
Our school year began today and although I had a fitful night of sleep (which included a middle-of-the-night inspiration for an opening day activity with tech), I have to say: I have a wonderful class of sixth graders. Wow. They seem wonderful in so many ways that I figure I am a lucky duck.
So, what was my inspiration?
As with most teachers, I try to do opening activities in which students identify their goals and dreams for their lives and then think about why those dreams are important and how they might be achieved. These activities give remarkable insight into our students. In years past, I had my students create a Dream Scene — an illustration of levels that lays out elements of their dreams for themselves.
But, what, I wondered, if we could do it on the computer. What would it look like? And how hard would it be to introduce? My insight was this: have kids illustrate a picture of their dream, or a symbol, in MS Paint with at least three complete sentences explaining what the dream is, why it is important and how they will achieve it.
After completing the illustration, students could move that picture into PhotoStory 3 and narrate their picture as a video, with some “sweeping” across the illustration. I could then bundle them together and share out at our classroom blog.
And it worked. My kids LOVED working with technology on Day One of the school year and many are already moving into PhotoStory. They were helping each other with the programs, and giving advice on using Paint, and showing each other how to use PhotoStory. I walked around, but let all of this unfold around me, quite pleased with my idea.
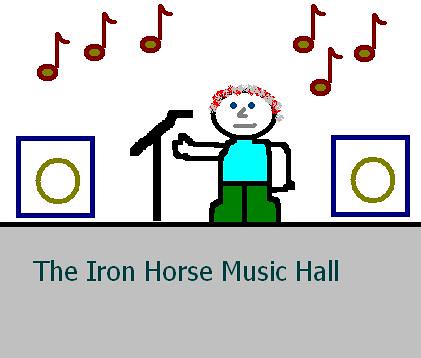
Here is an illustration for a movie that I made as a sample (which is too small to upload in either YouTube or Edublog TV or Flickr, I guess). But I wrote about my dream of playing with my band on the stage of the local music hall.
Peace (with breaking the silence),
Kevin
PS — This week’s Day in a Sentence is over at Deb’s Blog. Come on over and participate. We know you have deep thoughts to share.
I was trying to gather up some of the links from projects that my students did this past school year, now that they have left for summer vacation and another school as they make the big leap up to a combined middle and high school.
But looking at the list of these projects, and thinking of the ones not even listed here (such as prompts and exploration over at The Electronic Pencil), I realize how much they did while with me in writing class. I just completed the web pages for the Claymation and Digital Picture Book projects because the pieces seemed scattered all over the place and I wanted to bring them under one webby roof.
I think my push into using more technology to showcase their work was worth it, although it inevitably led to troubleshooting, work-arounds, and other headache-inducing periods of time. Still, as a collection, I think this list shows my students as creators of content and creative thinkers.
One of my regrets is that Youth Radio did not take off this year and there are a variety of reasons for this. But we saw, and see, the possibilities for podcasting across the world for young people and we need to figure out if it is worth re-launching the project for next year. Any ideas?
This is the last part of a series of posts I am doing around claymation animation in the classroom and I wanted to talk about what you can do once the movies are completed. Although students enjoy making movies just for the sake of making movies, I do try to instill the values of an authentic audience in their minds. This way, they understand that someone else will be watching their work. The idea of audience gives focus.
Once the movies are done, we showcase them in a variety of ways:
On our classroom weblog, all of the claymation movies get their own post, allowing the rest of our sixth graders to see what my homeroom students have done and also giving access to the movies to families and friends from any location in the world;
We burn the movies onto a DVD and every student received their own copy of the DVD in the final days before the end of the year. We spent an afternoon, watching the shows and laughing at the funny things you can do with clay;
We show the DVD over our school’s internal television network for all classrooms. This is done a few times during the day, so that teachers have different opportunities to show it to students. We also provide a DVD to any teacher who wants it;
We create a webpage with all of the movies on it, to show the work as one collective unit.
And just to end on a nice collective note, here is an Animoto movie of images from the claymation projects:
Today is the last day of the year for my sixth graders — which makes me both happy and sad (you teachers know what I am talking about). For the past three days, the kids have been working on the laptops for the last time, using Pivot Stickman Animation to create little animated movies.
I mostly let them have fun with it and showed them the basics of Pivot, and then some lessons on MovieMaker for those who were not part of my homeroom class (which worked on Claymation movies), and also Super Dooper Music Looper. They loved Pivot and they loved Music Looper, and some were able to do all three programs and created tiny movies.
I gathered the ones I could collect here for this little collection:
The best part for me? The credits one of the students put (on the last flick) that thanks me for helping her improve as a writer this year. Yeah.
This is the second in a series of posts about my claymation project this year. The first post was just a basic overview of the project. This post will deal a bit more with some of the resources that I used and how I went about launching claymation with my sixth graders.
First of all, this is the fourth year that I have been doing claymation. The first two years, I used simple digital still images and MovieMaker to add narration and titles. Last year, following the lead of my friend Tonya W., I shifted to using a freeware program called Stop-Motion Animator. This software uses a webcam to capture “frames” as an .AVI video file. This shift to Stop-Motion Animator allowed my students to create moving movies, and not just still images. This was a big leap forward for us, although now it required more patience from my students and increased video editing skills.
On the technical side, too, I found that I had to download a video Codec (called Xvid) in order for MovieMaker to recognize the AVI files created by the stop-motion software. Every move forward seems to require some kind of trouble-shooting, but that is the way of the world. In MovieMaker, students can add titles, transitions, audio narration, music and some features of movie production. The most valuable? The ability to slow down a video segment (through MM’s video effects) because all too often, students have not shot enough frames to match their narration. This gives them a little leeway.
For the writing element, we often focus on some aspect of writing. One year, it was how setting informs a story. Another year, it was integrating science by having students invent a new creature and how the habitat that it lives in affects its development. This year, I decided to focus on Climate Change.
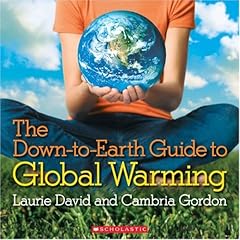
First, we used a book called “The Down to Earth Guide to Global Warming” by Laurie David and Cambria Gordon. It’s a kid-friendly look at climate change. I used some of my collected points via Scholastic Books to purchase about seven of the books for the classroom. We also did some research around global warming, just to ground the students on the issue.
Next, students created clay figures and we use the cheap clay you can get at any department store. The clay is a bit messy but it is cheap and they can use as much as they need. I also provide a box of craft supplies, such as googlie eyes, sticks, etc. This creation of clay figures made the project character driven and I have often had the story done first before the characters but this year, I did the reverse. The result? I think it helped students when considering a story idea to have a character they could put into action. They could tangibly hold it in their hands as they were writing.
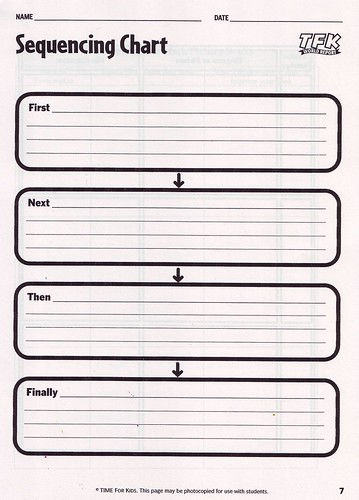
From there, they used both a storyboard and a concept mapping sheet to plan out their stories. The storyboard allows them to think about the “scenes” in the movie and the concept map provides a structure for a framework of story sequencing — from start to middle to end.
Normally, we then move into writing the script, but this year (as I mentioned in my last post), I decided to see how things would fare if we shifted into filming and letting them use the storyboard and concept map to create dialogue and narration (a mixed bag, I must say).
The filming takes time — I would guess this part of the project took some groups three 45-minute sessions to seven 45-minute sessions. My job is to encourage and push them along, otherwise, some groups would never get the filming completed. Once they have the raw footage, we move the video into MovieMaker, edit out fingers and hands that crop into the footage and begin to piece things together with narration. Getting good audio levels from a group of students is difficult, as microphone placement is crucial. But some kids like to pull the microphone almost into their mouth and others try to keep as far . As they are adding titles and credits, I remind them that credits should probably not be longer than the movies (which run anywhere from one minute to three minutes long, total).
This is a key point for me: I show the students how to edit, but I don’t edit for them (unless there is some emergency). I have to resist the urge to take over their project. I really want the movies to be theirs and theirs alone, and sometimes that means I wince a bit (to be honest) at the final product, and think about how I could swooped in and done something differently. But, that moment passes, and I realize that they have complete ownership over their movies.
Finally, we “create” the movies as video files and share them out. I’ll write more about publishing the movies in my next segment.
As I did with my Digital Math Book reflections, I am going to break my reflection about our recent claymation projects down over a few days.
With the school year ending in just a few days, my students were rushing to finish up their Claymation Movies this past week. More time would have been helpful and I was frantically carving out small blocks of time here and there just to get them some space for editing and adding audio. It didn’t help that we had a few kids absent on a few days.
But eight small movies are now done, with mixed results, I think. On one hand, my sixth graders loved working with the clay and with the stop-motion animation software. They “got” it pretty quickly, although my constant preaching for patience doesn’t always resonate with all students. Patience is key to claymation and the more raw video they can gather, the more flexibility they will have later.
The theme this year was Climate Change and I will detail a bit further how we went about things in another post. Essentially, they had to work in some aspect of the environment into their stories. In the past, I have had groups of students work collaboratively with second graders, but that didn’t work out this year due to scheduling difficulties. So we were on our own.
I also experimented with a different approach: I let the students create characters out of clay first and then they developed the story second, via storyboarding and concept mapping. I had hoped that the characters might infuse the stories and I do believe that happened, for the most part. I wish I had forced more time on them to develop scripts, but I wanted to see how it would turn out if I was not quite as vigilant. That didn’t work out so well, I think, as the stories in the movies seem weaker than usual this year. The script-writing process gives them focus.
I will detail the unit planning and the resources, and how we publish the movies, a bit further later this week. Plus, I will give a lowdown on a summer camp for kids that I am helping to run again this year that focuses on stop-motion movie making.
This is the fourth in a series of reflective posts I am writing about my Digital Picture Book Project (see post one, post two and post three). Today, I want to share some of the finer details, from a teaching stance, and give some pointers if you are considering such a project.
First of all, here is the basic plan that I follow. It obviously has more details to it in practice, but this gives you some idea of what it looks like:
Week One: Come up with a concept and target a specific audience. Develop a storyboard with sketch drawings and frame story ideas. Invite in an author/illustrator to talk about the process.
Week Two: Write a rough draft of the story in Microsoft Word and proofread. Begin work on the computers.
Week Three: Work towards completion of pictures and words; Consider adding multimedia elements such as audio narration, slide and image transitions, etc. Classmates read and critique the developing picture books, providing authentic input for revisions.
Week Four: Invite students from younger grades to tour the classroom in round robin format, reading and/or listening to stories and asking questions of writers; reflect on process and experience.
Week Five and beyond: Publish the picture books to the Sixth Grade Weblog (for families) and print out two copies of every book (one for writers and one for school library), if budget permits. Teacher grades projects.
I use a scoring rubric, which I share with my students at the start of the project that covers such areas as the story, the math concept, the design of the book, and spelling/grammar issues. (you can view the rubric here, if you want. Feel free to use it, adapt it or whatever).
We do regular check-ins as a way for me to monitor progress, but also as a way for students to reflect upon what they are doing. These check-ins begin as writing prompts and then move into a classroom sharing and discussion. I find that at these moments, many of the students who have a good grasp on technology emerge as leaders. They will often share some tricks they have discovered and offer to help others. I love those moments, particularly when the not-so-cool kid suddenly becomes very cool indeed.
I am noticing the quality of books are getting better each year (this is the third year of this project) and that may be that I have more models from previous years to show students. It may also be that I am giving them more time, even though some continue to feel rushed when the deadline emerges. The use of storyboarding and graphic organizers are crucial to keep focus on the story before a computer is even booted up, and while the story may change as they move along in a natural way, the outline they have created keeps them on track.
Here is something else I love: having my students share their books with younger students at our school. We set aside periods of time when younger grades can visit our classroom, or join us in the library (where our librarian is a partner in this project) and view the books on the computers. My kids become truly published writers and the younger students see some possibilities of technology. They are usually in wow-ed by the books. And anything that brings older and younger students together is something I am in favor of.
Finally, I should relate some of the technical aspects of what we are doing. Along with Powerpoint, we use a classroom Weblog (The Electronic Pencil) to showcase the stories for parents. I save the books as Powerpoint Shows, upload and share with my Box.net account so that kids can download them at home, if you want. Box.Net also allows me to track the number of downloads. And the blog allowed students from all four classes to be able to view the math books from friends in the other three classes, to their great delight. They also left some quick comments on the blog about the books they read.
I tinkered with using Slideshare, but then found that the books were flattened out (although the links to the web worked, so that was a plus). In the past, I have also made the books into PDFs, but I did not do that this year (although I offered to do that for any student who did have access to Powerpoint or Microsoft’s PP viewer software).
I turn the books into videos using some software I purchased called PPT to Video (by Wondershare). It’s quite easy to use and allows the animation to work, which is crucial. I wish there were a free service out there that would do the same, but I use the software for other projects, too, so it was worth the cost that I paid for it. I also turned to web-based Animoto this year to make a compilation video of various slides from everyone’s books. The kids LOVED seeing parts of their stories turned into a music video. (And Animoto has a service account for educators that allows you to make and then download a video file for free, which is a wonderful gesture on their part. You can also upload automatically from Animoto into YouTube for sharing on blogs, etc.)
Here is the final video collection of picture books:
Thanks for reading the posts and watching the books. I hope you try it yourself, and if you have a similar project, I hope you will share your own reflections with us.
Peace (in pictures),
Kevin
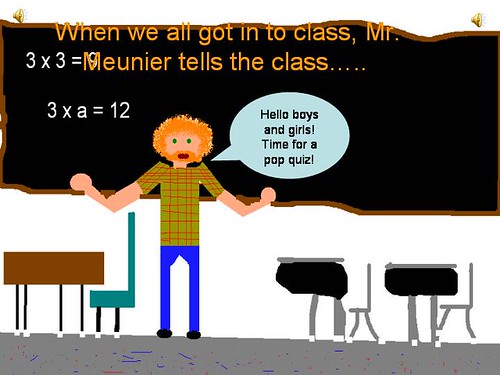
PS — I have to share this picture that one of my students did of our math teacher in front of the class, giving a pop quiz. It cracks all of us up to no end.

